
Confluence is the default XBMC / Kodi skin yet it is very robust and offers very few customization trade offs for those wanting the convenience of the default theme with robust UI functions. However, Confluence is very limiting in terms of the main navigation and your ability to customize within the XBMC / Kodi UI. This is a short tutorial on how to add a menu item to Confluence in XBMC / Kodi. This walk through will cover a Windows machine, but for all the different environments our there all you will need to do is change the file paths to match your OS.
Please copy all xml files you edit to your desktop as a backup.
Update: Note that in the paths below the “XBMC” directory in the roaming folder will now be “Kodi.”
Alternatives to Adding a Menu Item to Confluence XBMC (Kodi)
If you don’t want to futz with XML files or if you plan on doing a considerable overhaul to Confluence then I would highly recommend moving forward with an alternative opposed to adding a custom navigation item to Confluence.
- Use a different skin that permits this within the XBMC UI. I personally use Ace, but many others allow for main menu customization that you will not find with Confluence.
- Use the Confluence Modified skin. This allows for the Confluence look you love with additional customization options. You will need to install from Zip. Instructions in the link I provided. If you receive a “dependencies not met” prompt then I would recommend you cut your losses and move forward with an alternative, though, if you feel the juice is worth the squeeze you can manually load the dependent addons.
How to Add a Menu Item to Confluence XBMC (Kodi)
For reference, Kodi’s resource to adding a menu item to Confluence can be found here. If you think that’s vague, keep reading.
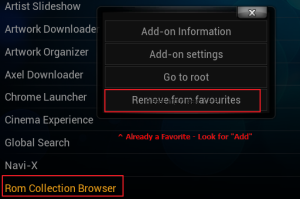
- Add the function you want to be your new Confluence menu item as a favorite within XBMC (Kodi). Open XBMC/Kodi > [your item – for me, I’m doing Rom Collection Browser] > context menu (c) > Add to Favourites
Side Note: this step is optional and just for us to make the launch script more convenient. You can delete this from favorites afterward or not do this at all and skip to step four if you know the launch script. - Open Favourites.xml file (recommend use of rich text editor such as Notepad ++). Make sure you can view hidden files on your machine and find this file at the below path on Windows machines replacing “Trevor” and potentially drive letter with your information:
C:\Users\Trevor\AppData\Roaming\XBMC\userdata
- Find the favorite item you just added and copy the launch script. If this is the latest item you’ve added it will be your bottom script. Otherwise, hit ctr+f and search for a keyword in the favorite name. You’ll see:<favourite name=”name” thumb=”path”>Launch script</favourite>You’ll want to note the launch script and leave this file open for copying. For my example, I’m copying the bolded (in many cases “Runscript” below will be “ActivateWindow”):<favourite name=”Rom Collection Browser”
thumb=”C:\Users\Trevor\AppData\Roaming\XBMC\addons\script.games.rom.collection.browser\icon.png”>
RunScript("script.games.rom.collection.browser")</favourite> - Open Home.xml:C:\Program Files (x86)\XBMC\addons\skin.confluence\720p
- Hit ctr + f and search for “weather” or otherwise find the below:<item id=”7″>
<label>31950</label>
<onclick>ActivateWindow(Weather)</onclick>
<icon>-</icon>
<thumb>-</thumb>
<visible>!Skin.HasSetting(HomeMenuNoWeatherButton) + !IsEmpty(Weather.Plugin)</visible>
</item> - We will need to duplicate this entire XML entry. Copy this. You’ll paste it into the same file. The placement of which is dependent on where you want you Confluence navigation item to appear. In descending order the menu items work left to right. I’m adding mine directly below weather, which will put my Confluence menu item just to the right of Weather.
- Change the name item id of your duplicated weather menu item. This can be something arbitrary, but something not used already. A safe bet:<item id=”69″>
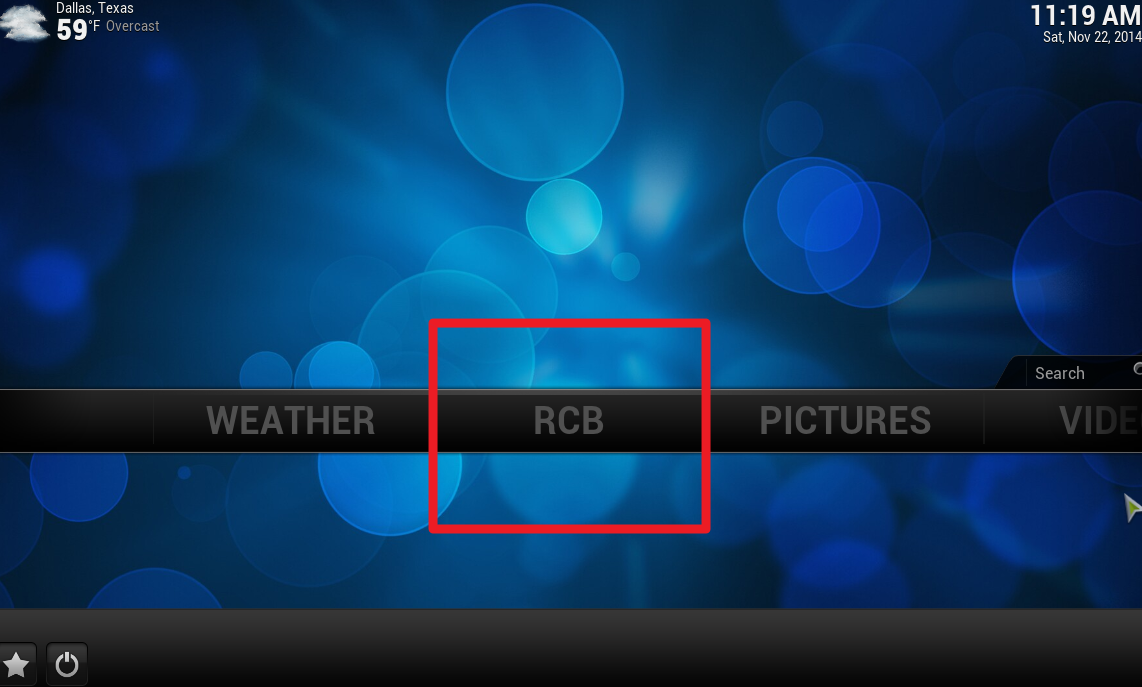
- Change the label to what you want your Confluence menu item to read:<label>RCB</label>
- Copy/paste your launch script from your Favourites.xml file within the <onclick> tags:
<onclick>RunScript("script.games.rom.collection.browser")</onclick>Final product for me:<item id=”69″>
<label>RCB</label>
<onclick>RunScript("script.games.rom.collection.browser")</onclick>
<icon>-</icon>
<thumb>-</thumb>
<visible>!Skin.HasSetting(HomeMenuNoWeatherButton) + !IsEmpty(Weather.Plugin)</visible>
</item> - Save and launch XBMC / Kodi.

That’s how to add a menu item to Confluence. You can edit IncludesHomeMenuItems.xml to get submenu items, but, honestly, if you have high expectations for customizing this way or if you want to do anything sexy I would implore you to use an alternative method – namely a different skin. The reason for this is one, getting too custom adds to the steps substantially and two, XBMC / Kodi does not have child themes, so when you update your install all your hard work will be gone unless you apply these changes to the new core file.
However, I did find this useful and not painful for adding top-level navigation to Confluence for frequented Addons etc.


Thank you, this worked perfectly for me after playing around for a while. I now get the hang of it. Excellent tutorial.
Hi,
How to do with a raspberry ?
Thank you
Ed
It should be the same, but I do not know the path to favourites.xml on a Raspberry pie.