Google Analytics is a great, though flawed, tool. It has endless potential and can accomplish most of your website tracking goals for the low price of free. Without diving into advanced setup or getting into unique situations I cover the basic necessities of a Google Analytics setup. I do not use Google Tag Manager, which is great, for this example.
The steps below will get you off the ground with accurate tracking and some recommendations of mine for cleaner data in Universal Analytics.
Necessities of a Google Analytics Setup
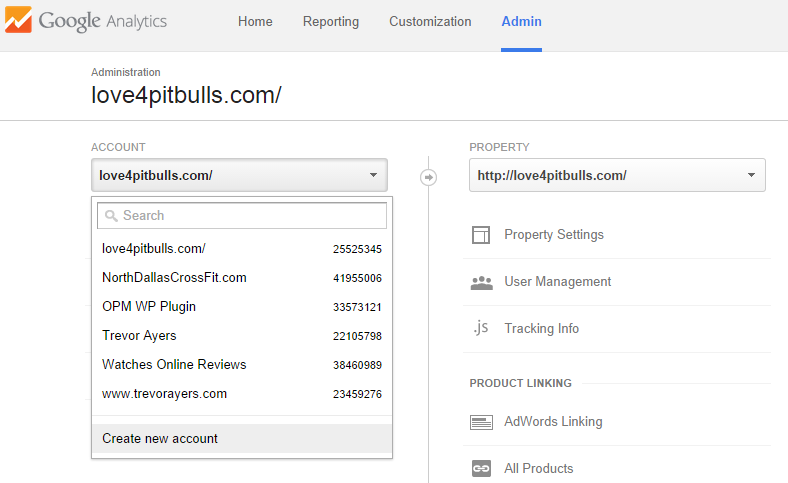
- Log into Google Analytics – Click “Admin” – “Create new account”
- The only notable point on the next page is to use the correct URL for your website. Yes, this means the subdomain – in most cases “www.” If your website doesn’t redirect to one or the other then follow these steps to redirect you non-www to your www form of your URL via .htaccess file. If you have issues setting up the redirect then Google your URL and use the version which is returning in Google’s search results.
- Fill out all fields and click “get tracking id”
Now that you have your account, here are the necessities for your Google Analytics setup (I like to do the changes within Analytics before placing code):
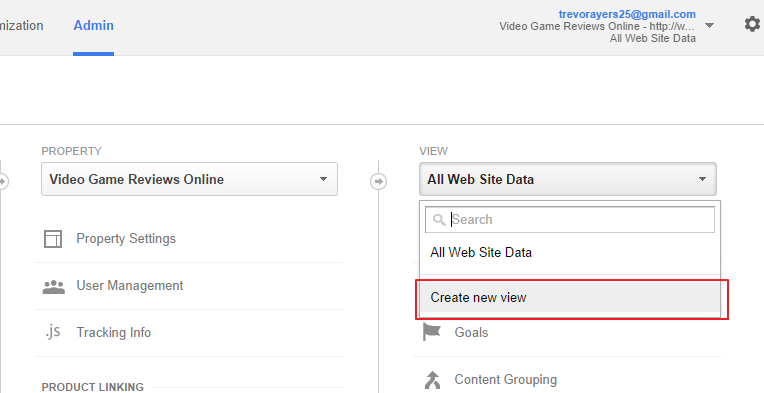
- Create a new view to add filters. Your “All Website View” should be left unfiltered and untouched. In admin interface click “create new view” and name this new view “filtered” or “use this one.” Just use it.
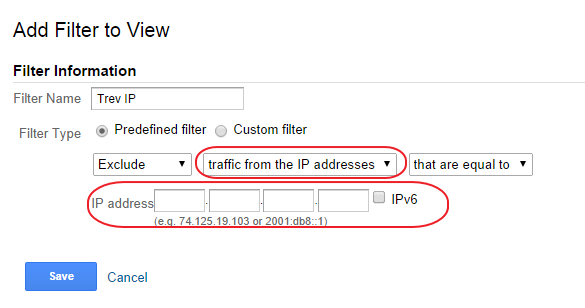
- Filter out your IP address, your company’s and anyone you don’t want. If you don’t know your IP Google what’s my IP and grab it. In the admin interface under the view click “filter.” Then “+ new filter.” Name it and change middle drop down from ISP to traffic from IP address:
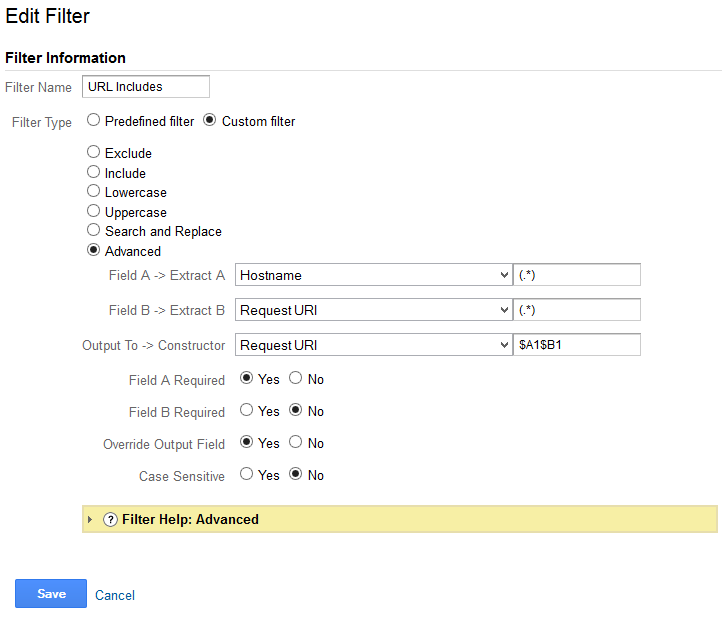
- The “show domain” filter is almost always a good idea. Add a new filter and reflect the below exactly to have your actual domain show and not just directories/files trailing the TLD (www.example.com/ vs “/”)
- Link your AdWords account (skip if not using AdWords). Admin interface – “AdWords Linking” under “property.” Your account, if under the same email/MCC, should already be checked. Just click “continue.” Hit the “Linked view(s)” drop down and, at a minimum, select the newly created view. Click “link accounts” Changes need to be made at AdWords to import Analytics data. I will not touch on that in this post.
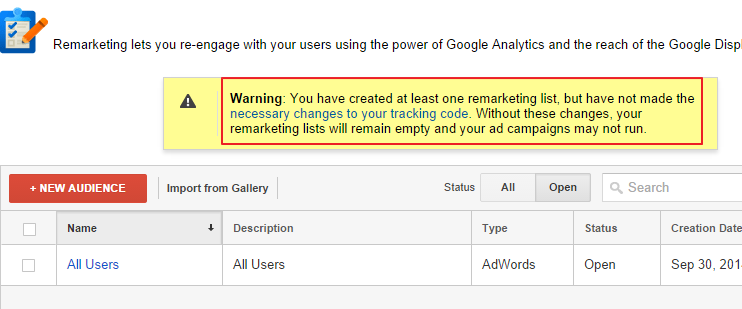
- Setup interest and demo + remarketing. Admin interface click “Remarketing” then “Audiences.” +new audience. Make sure to share with your AdWords account here or you cannot later. Click “Next step” Just use “all users” unless you have other goals and name it accordingly. Save.
- You’ll get a yellow warning message. Click it. It will have the remarketing addition to the Universal Analytics code.
 In the window that opens click “Tracking code change for Universal Analytics….” Grab this entire code.
 - Paste the code in notepad or something that won’t add formatting. Go back to admin interface then “.js tracking info” – “tracking code.” Grab your tracking id (UA-xxxxxx-x) < not “x” obviously. Replace the space holder in the script you grabbed.
- Paste this code in your site’s html just above the </head> tag.
- Here’s a post I wrote to easily check to ensure the Analytics code is on all pages of your site.
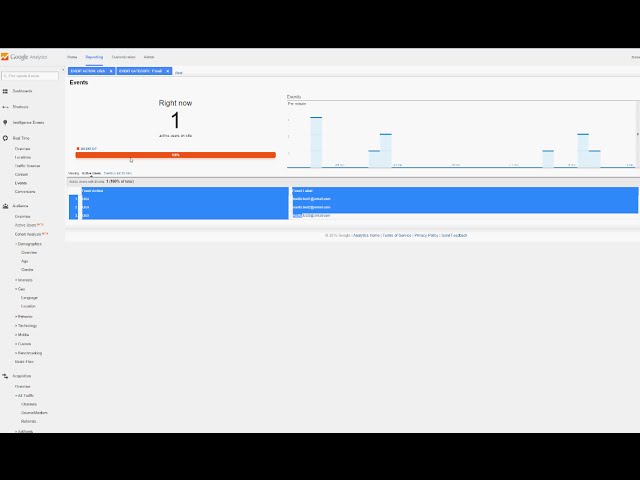
- To ensure it’s working properly you can look at the real-time statistics of your site under the unfiltered view. Just click around on your site and make sure you’re monitoring the unfiltered view, so that you can actually see your own real-time site interaction.
- Setup demographic/interest tracking by following these steps in another post.
- link your Google Webmaster Tools account. Admin Interface “property settings.” and click the blue “edit” under Webmaster Tools Settings. If you haven’t verified your site in GWT it you will need to click “add a site to Webmaster Tools.” Click “Add a site” enter URL, then use the Analytics account to verify.
Voila. You have the basic necessities of a Google Analytics Setup implemented for your site. Yes, there’s more you can do, but now the foundation is done right.