Today is a quick tutorial on how to fix the error message: Fatal error: Allowed memory size of 67108864 bytes exhausted

If you’ve never seen this message, good, you’re hosting provider is good. I, however, have elected to go with free hosting at 000WebHost and while it’s a good free host, it is not a good host. Not to say I would hit these same barriers with a paid account.
Fix WordPress Fatal Error Allowed Memory Size Limit
To fix the Fatal error: Allowed memory size of error message all we’re going to do is add one line to our .htaccess file. Simple steps below:
- Access your site via FTP. Your CMS doesn’t work? Always go straight to your server. I like Filezilla as an FTP client.
- Log in to your site via your FTP credentials. Yes, these can be different than your CMS credentials.
- Navigate to your site’s root on the server where you’ll see a public_html folder. It may arrive here when you first log in.
- Double-click public_html
- Find a file named .htaccess. If you don’t see this file first click “server” in your top nav bar then “force showing hidden files.” If you found it skip step 6.
- No .htaccess file? open notepad or textedit and save your file to your desktop. Name it “htaccess.” Upload this file into your public_html file on your server. Click on this file and rename it “.htaccess” with not extension.
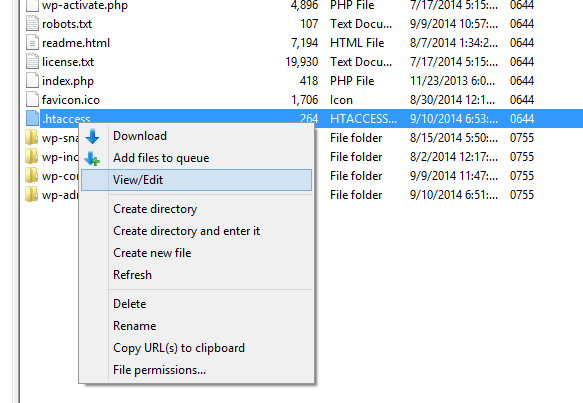
- Right click on your .htaccess file and click “View/Edit”
- Add the following line without quotation marks anywhere in this file: “php_value memory_limit 128M”
- Save the file
- Return to Filezilla
- Click “Yes” on the “A file previously opened has been changed” message.
You’re done! You just fixed the annoying Fatal error: Allowed memory size of 67108864 bytes exhausted error!